
컬쥐네 다락방
미니 프로젝트 | 리눅스 인프라 구축을 통한 Wordpress 구현 본문
클라우드 미니 프로젝트
목차
- 프로젝트 개요
1.1 목표
1.2 주제 선정 이유
1.3 진행 기간
1.4 인프라 구축 환경
1.5 서버 구성 - 구성 과정
2.1 웹 서버 구축
2.2 DB 서버 구축
2.3 워드 프레스 초기 설정
2.4 워드 프레스 실행
2.5 DNS 서버 구축
2.6 SSL을 이용한 HTTPS 적용 - 진행 과정에서 생긴 에러 해결 목록
1. 프로젝트 개요
1.1 목표
리눅스 인프라 구축을 통한 WordPress 구현
1.2. 주제 선정 이유
클라우드 수업을 들으며 공부한 네트워크 관련 CS 지식과 리눅스 시스템 지식들을 정리하고 내 것으로 만들고 싶었습니다. 리눅스 기초의 핵심이라 생각되는 서비스 관리, 소프트 웨어 관리, 네트워크 설정, 방화벽, DNS, 가상 호스트와 Apache 등을 모두 사용하여 인프라를 구축하고자 했습니다.
하나의 서버에서 Wordpress와 DB를 사용하는 것이 아니라 웹 서버와 DB 서버, DNS 서버를 나눠서 구축하여 실제 서비스와 비슷한 환경을 구성하고자 노력했습니다.
1.3. 진행 기간
- 2022.03.15(화) ~ 2022.03.18(금)
1.4. 인프라 구축 환경
- CentOS 7 + Virtual Box
- Wordpress
- Apache
- PHP
- MariaDB
- named
1.5. 서버 구성

- 웹 서버 (Apache + PHP + Wordpress)
- DNS 서버 (MariaDB)
- DB 서버 (named)
2. 구성 과정
2.1. 웹 서버 구축
2.1.1. 네트워크 초기 설정
클라이언트를 담당할 서버의 네트워크 초기 설정을 진행한다.
enp0s8을 사용하며, 네트워크를 설정해준다.
nmcli con add con-name client01 ifname enp0s8 type ethernet ip4 192.168.56.101/24 gw4 192.168.56.1
nmcli con mod client01 ipv4.method manual ipv4.dns 8.8.8.8
nmcli con reload
nmcli con up client01

hostnamectl set-hostname wordpress.miniproejct
최신 버전 설치를 위해 yum 업데이트 진행
yum -y update2.1.2. 웹 서버 설치
httpd를 설치하고 방화벽 정책을 추가해준다.
[root@wordpress ~]# yum install -y httpd
Loaded plugins: fastestmirror, langpacks
Loading mirror speeds from cached hostfile
 * base: mirror.kakao.com
 * extras: mirror.kakao.com
 * updates: mirror.kakao.com
Package httpd-2.4.6-97.el7.centos.4.x86_64 already installed and latest version
Nothing to do
[root@wordpress ~]# rpm -qa httpd
httpd-2.4.6-97.el7.centos.4.x86_64

[root@wordpress wordpress]# systemctl restart httpd.service
[root@wordpress wordpress]# systemctl status httpd.service

[root@wordpress ~]# firewall-cmd --add-service=http --permanent
success
2.1.3. PHP 7.4 이상 설치
yum으로 설치하면 5.4 버전이 설치됨. remi와 yum-utils로 버전 변경
# yum install https://rpms.remirepo.net/enterprise/remi-release-7.rpm
# yum install -y yum-utils  #버전 변경을 위한 yum유틸설치
# yum-config-manager --disable remi-php54 (php5.4버전 끄기)
# yum-config-manager --enable remi-php74 (php7.4버전 켜기)
# yum install php74 또는 필요한 라이브러리 같이 설치하기
# yum install -y php74-php php-cli php74-scldevel \
php74-php-xml php74-php-xmlrpc php74-php-soap \
php74-php-process php74-php-pgsql php74-php-pdo \
php74-php-opcache php74-php-mbstring php74-php-ldap \
php74-php-json php74-php-ioncube-loader php74-php-intl \
php74-php-gmp php74-php-gd php74-php-fpm php74-php-devel \
php74-php-dba php74-php-common php74-php-cli \
php74-php-bcmath php74-php-phpiredis  php74-php-pecl-igbinary \
php74-php-pecl-imagick-im7 php74-php-pecl-imagick-im7-devel \
php74-php-pecl-igbinary-devel php74-php-pecl-geoip \
php74-php-pecl-xdebug php74-php-pecl-mysqlnd-azure
2.1.4. 웹 데몬 재시작
PHP74는 웹 데몬에서 라이브러리처럼 동작한다.
따라서 PHP를 설치한 후 웹 데몬을 재시작해준다.
# systemctl restart httpd.service
# systemctl status httpd.service
2.1.5. 워드 프레스 다운 받기
참고 사이트 https://wordpress.org/support/article/how-to-install-wordpress/
워드 프레스는 URL로 바로 받기 위해 wget 패키지를 사용했다.
# yum install -y wget  #URL로 바로 받기 위해 wget 패키지설치
# wget https://wordpress.org/latest.tar.gz
# file latest.tar.gz
# tar -xvzf latest.tar.gz -C /var/www/html  #아카이브 및 압축 해제 (위치지정- 아카이브 해제 되는 디렉토리를 확인해야한다. 특정 디렉토리내에 아카이브가 해제되기도 하기 때문이다.)
별도 스토리지를 사용할 경우, 해당 디렉토리로 압축을 해제해야한다.

# mkdir /var/www/html/wordpress/uploads
#게시판을 그림파일 올릴때 사용할 디렉토리를 생성한다 위에서 지정한 경로를 꼭 확인해야한다. 그아래 uploads 디렉토리를 생성해야함.
2.2. DB 서버 구축
2.2.1. MariaDB 설치
워드 프레스 설치를 위해 MariaDB 10.2 버전 이상이 필요하기때문에 mariaDB 사이트(https://mariadb.org/download/?t=repo-config)에서%EC%97%90%EC%84%9C) Centos7(x86_64) 와 10.2 버전을 선택 후 repository를 확인한다.
그 후 그 내용을 /etc/yum.repos.d/MariaDB.repo 파일로 저장한다.
# MariaDB 10.2 CentOS repository list - created 2022-03-15 15:37 UTC
# https://mariadb.org/download/
[mariadb]
name = MariaDB
baseurl = https://mirror.yongbok.net/mariadb/yum/10.2/centos7-amd64
gpgkey=https://mirror.yongbok.net/mariadb/yum/RPM-GPG-KEY-MariaDB
gpgcheck=1
새 버전을 위해 구버전을 삭제하고 yum을 이용해 Mariadb 설치
# yum remove mariadb
# yum info Mariadb-server
# yum install -y MariaDB-server MariaDB-client
설치된 MariaDB는 다음 명령어로 확인 가능.
# rpm -qa MariaDB*  패키지이름확인
# rpm -ql MariaDB-server  실행파일, 데몬명 확인  (mariadb.service, mysql_secure_installation보안설정스크립트)
# rpm -ql MariaDB  실행파일, 데몬명 확인  (mysql 클라이언트 접속 명령어)
2.2.2 MariaDB 초기 설정
systemctl을 사용해 설치된 mariadb를 활성화 시켜주고 /mysql_secure_installation을 통해 보안 설정과 MariaDB의 초기 설정을 만져준다.
[root@wordpressdb ~]# systemctl start mariadb.service
[root@wordpressdb ~]# systemctl enable amriadb.service
Failed to execute operation: No such file or directory
[root@wordpressdb ~]# systemctl enable mariadb.service
Created symlink from /etc/systemd/system/mysql.service to /usr/lib/systemd/system/mariadb.service.
Created symlink from /etc/systemd/system/mysqld.service to /usr/lib/systemd/system/mariadb.service.
Created symlink from /etc/systemd/system/multi-user.target.wants/mariadb.service to /usr/lib/systemd/system/mariadb.service.
[root@wordpressdb ~]# /usr/bin/mysql_secure_installation

NOTE: RUNNING ALL PARTS OF THIS SCRIPT IS RECOMMENDED FOR ALL MariaDB
      SERVERS IN PRODUCTION USE!  PLEASE READ EACH STEP CAREFULLY!

In order to log into MariaDB to secure it, we'll need the current
password for the root user.  If you've just installed MariaDB, and
you haven't set the root password yet, the password will be blank,
so you should just press enter here.

Enter current password for root (enter for none):   #현재 루트 암호가 없으니 엔터
OK, successfully used password, moving on...

Setting the root password ensures that nobody can log into the MariaDB
root user without the proper authorisation.

Set root password? [Y/n] y   #root 암호 설정
New password:
Re-enter new password:
Password updated successfully!
Reloading privilege tables..
 ... Success!


By default, a MariaDB installation has an anonymous user, allowing anyone
to log into MariaDB without having to have a user account created for
them.  This is intended only for testing, and to make the installation
go a bit smoother.  You should remove them before moving into a
production environment.

Remove anonymous users? [Y/n] y
 ... Success!

Normally, root should only be allowed to connect from 'localhost'.  This
ensures that someone cannot guess at the root password from the network.

Disallow root login remotely? [Y/n] no  #원격 접속을 막을 것인가? DB 서버가 따로이기 때문에 no를 해준다
 ... skipping.

By default, MariaDB comes with a database named 'test' that anyone can
access.  This is also intended only for testing, and should be removed
before moving into a production environment.

Remove test database and access to it? [Y/n] yes  #테스트 데이터베이스 삭제
 - Dropping test database...
 ... Success!
 - Removing privileges on test database...
 ... Success!

Reloading the privilege tables will ensure that all changes made so far
will take effect immediately.

Reload privilege tables now? [Y/n] yes  #저장
 ... Success!

Cleaning up...

All done!  If you've completed all of the above steps, your MariaDB
installation should now be secure.

Thanks for using MariaDB!
2.2.3. MariaDB 포트 설정
웹 서버와 DB 서버를 따로 구축하기 때문에 방화벽에서 포트를 열어줘야한다.
[root@wordpressdb ~]# firewall-cmd --permanent --zone=public --add-port=3306/tcp
success
[root@wordpressdb ~]# firewall-cmd --reload
success
[root@wordpressdb ~]# firewall-cmd --list-all  #생성된 포트 확인 가능
public (active)
  target: default
  icmp-block-inversion: no
  interfaces: enp0s3 enp0s8
  sources:
  services: dhcpv6-client ssh
  ports: 3306/tcp
  protocols:
  masquerade: no
  forward-ports:
  source-ports:
  icmp-blocks:
  rich rules:
2.2.4. wordpress에서 사용할 DB 생성
만들어진 MariaDB에 wordpress에서 사용할 DB를 생성한 뒤 사용자를 만들고 사용자에게 게시판 사용 권한을 부여한다.
[root@wordpressdb ~]# mysql -u root -p
Enter password:
Welcome to the MariaDB monitor.  Commands end with ; or \g.
Your MariaDB connection id is 15
Server version: 10.2.43-MariaDB MariaDB Server

Copyright (c) 2000, 2018, Oracle, MariaDB Corporation Ab and others.

Type 'help;' or '\h' for help. Type '\c' to clear the current input statement.

MariaDB [(none)]> CREATE DATABASE wordpress;  #wordpress에서 사용할 데이터 베이스 생성
Query OK, 1 row affected (0.00 sec)

MariaDB [(none)]> CREATE USER adminuser@'%' IDENTIFIED BY 'dkagh1'; #사용자 생성
Query OK, 0 rows affected (0.00 sec)

MariaDB [(none)]> GRANT ALL PRIVILEGES ON wordpress.* TO adminuser@'%' IDENTIFIED BY 'dkagh1';
Query OK, 0 rows affected (0.00 sec) #게시판 사용 권한 부여

MariaDB [(none)]> FLUSH PRIVILEGES; #권한 적용
Query OK, 0 rows affected (0.00 sec)

MariaDB [(none)]> exit
Bye
웹 서버와 DB 서버에서 설치한 프로그램들은 다음 명령어를 통해 버전 확인이 가능하다.
rpm -qa php74
rpm -qa MariaDB-*
rpm -qa httpd
또는 httpd -v
2.3. 워드 프레스 초기 설정
위에서 설치한 웹 서버의 워드 프레스에 DB 서버를 연결할 수 있도록 설정해준다.
# ls -l /var/www/html/wordpress/wp-config-sample.php  #샘플 파일 경로. 이를 활용한다
# cd /var/www/html/wordpress
# cp wp-config-sample.php wp-config.php #샘플파일을 복사하여 새로 파일을 만들어준다
# chown -R apache:apache /var/www/html/wordpress 압축해제된 디렉토리와 그 하위 디렉토리에 소유자,소유그룹 변경

# vim  wp-config.php
// ** Database settings - You can get this info from your web host ** //
/** The name of the database for WordPress */
define( 'DB_NAME', 'wordpress' ); 데이터 베이스이름 설정
/** Database username */
define( 'DB_USER', 'adminuser' ); 데이터베이스 사용자 이름 설정
/** Database password */
define( 'DB_PASSWORD', 'dkagh1' ); 위 사용자의 암호 설정
/** Database hostname */
define( 'DB_HOST', '192.168.56.150' ); DB 서버를 별도로 운영하기위해 DB 서버의 IP주소 설정
2.4. 워드 프레스 실행
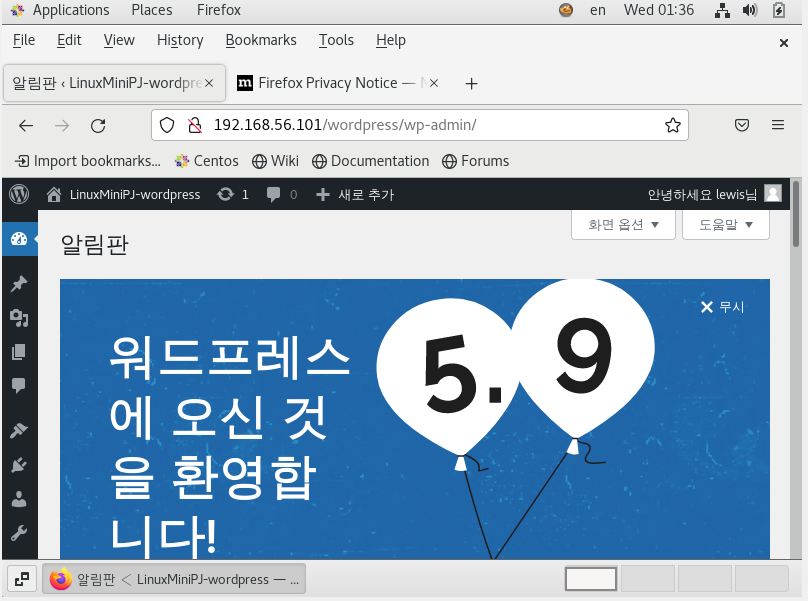
설정을 완료하고 클라이언트 브라우저 (웹 서버 브라우저)에서 http://ip주소(클라이언트)/wordpress/ 로 접근하면 환경 설정 마법사가 시작된다.
언어, 사이트 이름, 관리자, email, 사용자 계정을 추가하고 로그인하면 게시판 사용이 가능해진다.
이후 DB 서버에서 접속하여 wordpress의 DB를 살펴보면 방금 내가 만든 유저 정보가 등록된 모습을 확인할 수 있다.
MariaDB [(none)]> use wordpress
Reading table information for completion of table and column names
You can turn off this feature to get a quicker startup with -A

Database changed
MariaDB [wordpress]> show tables
    -> ;
+-----------------------+
| Tables_in_wordpress   |
+-----------------------+
| wp_commentmeta        |
| wp_comments           |
| wp_links              |
| wp_options            |
| wp_postmeta           |
| wp_posts              |
| wp_term_relationships |
| wp_term_taxonomy      |
| wp_termmeta           |
| wp_terms              |
| wp_usermeta           |
| wp_users              |
+-----------------------+
12 rows in set (0.00 sec)
MariaDB [wordpress]> DESCRIBE wp_users
    -> ;
+---------------------+---------------------+------+-----+---------------------+----------------+
| Field               | Type                | Null | Key | Default             | Extra          |
+---------------------+---------------------+------+-----+---------------------+----------------+
| ID                  | bigint(20) unsigned | NO   | PRI | NULL                | auto_increment |
| user_login          | varchar(60)         | NO   | MUL |                     |                |
| user_pass           | varchar(255)        | NO   |     |                     |                |
| user_nicename       | varchar(50)         | NO   | MUL |                     |                |
| user_email          | varchar(100)        | NO   | MUL |                     |                |
| user_url            | varchar(100)        | NO   |     |                     |                |
| user_registered     | datetime            | NO   |     | 0000-00-00 00:00:00 |                |
| user_activation_key | varchar(255)        | NO   |     |                     |                |
| user_status         | int(11)             | NO   |     | 0                   |                |
| display_name        | varchar(250)        | NO   |     |                     |                |
+---------------------+---------------------+------+-----+---------------------+----------------+
10 rows in set (0.00 sec)
MariaDB [wordpress]> SELECT * FROM wp_users;
+----+------------+------------------------------------+---------------+-------------------+---------------------------------+---------------------+---------------------+-------------+--------------+
| ID | user_login | user_pass                          | user_nicename | user_email        | user_url
     | user_registered     | user_activation_key | user_status | display_name |
+----+------------+------------------------------------+---------------+-------------------+---------------------------------+---------------------+---------------------+-------------+--------------+
|  1 | lewis      | $P$BJ3JmfkNjtv1zSU0RU62faNSdn5aaS/ | lewis         | 123@gmail.com | http://192.168.56.101/wordpress | 2022-03-15 16:31:02 |                     |           0 | lewis        |
+----+------------+------------------------------------+---------------+-------------------+---------------------------------+---------------------+---------------------+-------------+--------------+
1 row in set (0.00 sec)
2.5. DNS 서버 구축
2.5.1. 패키지 설치
yum -y install bind bind-utils2.5.2. 서비스 설정
고정 아이피 설정 및 DNS 서버 주소, hostname 설정
[root@localhost ~]# nmcli con add con-name dnsserver ifname enp0s3 type ethernet ip4 10.0.2.10/24 gw4 10.0.2.2
연결 'dnsserver' (fcf25bbe-0039-48c1-bb13-9196701b7ebd)이 성공적으로 추가되었습니다.
[root@localhost ~]# nmcli con mod dnsserver ipv4.dns 10.0.2.10
[root@localhost ~]# nmcli con reload
[root@localhost ~]# nmcli con up dnsserver
연결이 성공적으로 활성화되었습니다 (D-Bus 활성 경로: /org/freedesktop/NetworkManager/ActiveConnection/6)
[root@localhost ~]# cat /etc/resolv.conf
# Generated by NetworkManager
nameserver 10.0.2.10
[root@localhost ~]# hostnamectl set-hostname dns.miniproject
/etc/named.conf 설정
[root@dns ~]# vi /etc/named.conf

options {
        listen-on port 53 { any; };
        listen-on-v6 port 53 { none; };
        .....
        allow-query     { any; };
        .....
        zone "dnsserver.miniproject.com" IN {
        type master;
        file "dnsserver.miniproject.com.zone";
};
/var/named 설정
[root@dns ~]# ls /var/named
data  dynamic  named.ca  named.empty  named.localhost  named.loopback  slaves
[root@dns ~]# cd /var/named
[root@dns named]# cp named.empty dnsserver.miniproject.com.zone
[root@dns named]# vi dnsserver.miniproject.com.zone

$TTL 3H
@       IN SOA  dnsserver.miniproject.com.zone. root.dnsserver.miniproject.com. (
                                        0       ; serial
                                        1D      ; refresh
                                        1H      ; retry
                                        1W      ; expire
                                        3H )    ; minimum
        NS      dns.dnsserver.miniproject.com.
        A       10.0.2.1
dns     A       10.0.2.10
db      A       192.168.56.150
client  A       192.168.56.101


[root@dns named]# chmod 660 dnsserver.miniproject.com.zone
[root@dns named]# chown :named dnsserver.miniproject.com.zone
2.5.3. 서비스 활성화 및 방화벽 설정
[root@dns named]# systemctl start named
[root@dns named]# systemctl enable named --now
Created symlink from /etc/systemd/system/multi-user.target.wants/named.service to /usr/lib/systemd/system/named.service.
[root@dns named]# firewall-cmd --add-service=dns --permanent
success
[root@dns named]# firewall-cmd --reload
success
2.5.4. 확인
[root@dns named]# host dns.dnsserver.miniproject.com
dns.dnsserver.miniproject.com has address 10.0.2.10
2.5.5. 웹 서버 및 DB 서버의 DNS 주소 설정
dns 주소를 네트워크에 설정해주기
[root@wordpress ~]# nmcli con mod client01 ipv4.dns 10.0.2.10
[root@wordpress ~]# nmcli con reload
[root@wordpress ~]# nmcli con up client01

[root@wordpressdb ~]# nmcli con mod wordpressDB ipv4.dns 10.0.2.10
[root@wordpressdb ~]# nmcli con reload
[root@wordpressdb ~]# nmcli con up wordpressDB

##cat /etc/resolv.conf 을 입력했을때 네임서버가 여러가지 나오거나 다른 주소가 나온다면
##enp0s3으로 설정된 dns와 다른 주소로 네트워크를 만들어준다
ex)
[root@wordpress wordpress]# nmcli con add con-name static ifname enp0s3 type ethernet ip4 10.0.2.15 gw4 10.0.2.1 ipv4.dn
s 10.0.2.10
연결 'static' (292009a8-baed-4c7e-aed4-f8d73195be2c)이 성공적으로 추가되었습니다.
[root@wordpress wordpress]# nmcli con reload
[root@wordpress wordpress]# nmcli con up static
연결이 성공적으로 활성화되었습니다 (D-Bus 활성 경로: /org/freedesktop/NetworkManager/ActiveConnection/7)
[root@wordpress wordpress]# cat /etc/resolv.conf
# Generated by NetworkManager
search miniproject
nameserver 10.0.2.10
방화벽에도 dns를 추가해주기
[root@wordpress wordpress]# firewall-cmd --add-service=dns --permanent
success
[root@wordpress wordpress]# firewall-cmd --reload
success
[root@wordpress wordpress]# firewall-cmd --list-all
public (active)
  target: default
  icmp-block-inversion: no
  interfaces: enp0s3 enp0s8
  sources:
  services: dhcpv6-client dns http ssh
  ports:
  protocols:
  masquerade: no
  forward-ports:
  source-ports:
  icmp-blocks:
  rich rules:
이제 IP 주소가 아닌 도메인으로 접속할 수 있다.

2.6.SSL을 이용한 https 적용해보기
2.6.1. 웹 서버에 SSL 모듈 설치
[root@wordpress ~]# yum install -y mod_ssl***이때 내가 만든 DNS 서버가 유일하게 작동하고 있기 때문에 yum으로 네트워크에서 파일을 받아 올 수 없다.
enp0s3으로 만들어둔 static 네트워크를 내리고 client01의 ipv4.dns를 공개적으로 사용되는 ip로 바꿔준 후에 실행하고 다시 설정 값을 되돌려준다.
2.6.2. 방화벽 설정
현재 httpd를 이미 활성화 시켰기 때문에 httpd를 활성화하는 과정을 건너뛰고 방화벽에 https를 추가해준다.
[root@wordpress ~]# firewall-cmd --add-service=https --permanent
success
[root@wordpress ~]# firewall-cmd --reload
success
[root@wordpress ~]# firewall-cmd --list-all
public (active)
  target: default
  icmp-block-inversion: no
  interfaces: enp0s3 enp0s8
  sources:
  services: dhcpv6-client dns http https ssh
  ports:
  protocols:
  masquerade: no
  forward-ports:
  source-ports:
  icmp-blocks:
  rich rules:
2.6.3. 개인 키 생성
키를 생성할 위치로 이동한다 (고정되어 있다)
[root@wordpress ~]# cd /etc/pki/tls/certs/
[root@wordpress certs]#
키 생성하기

[root@wordpress certs]# openssl genrsa -out minipj.key 2048
Generating RSA private key, 2048 bit long modulus
...............................................+++
.................+++
e is 65537 (0x10001)
*참고
버전 = genrsa
키 생성 = out
키 이름 = minipj.key
키 비트수 = 2048
2.6.4. 인증서(CSR) 만들기
[root@wordpress certs]# openssl req -new -key minipj.key -out minipj.csr
You are about to be asked to enter information that will be incorporated
into your certificate request.
What you are about to enter is what is called a Distinguished Name or a DN.
There are quite a few fields but you can leave some blank
For some fields there will be a default value,
If you enter '.', the field will be left blank.
-----
Country Name (2 letter code) [XX]:kr  #국가 코드
State or Province Name (full name) []:seoul  #시 이름
Locality Name (eg, city) [Default City]:seocho  #시/군/구
Organization Name (eg, company) [Default Company Ltd]:encore  #회사명
Organizational Unit Name (eg, section) []:cloudclass  #부서명
Common Name (eg, your name or your server's hostname) []:client.miniproject.com  #서비스 도메인명
Email Address []:test123@gmail.com #이메일 주소

Please enter the following 'extra' attributes
to be sent with your certificate request
A challenge password []:
An optional company name []:
2.6.5. 키와 인증서 합치기
[root@wordpress certs]# openssl x509 -req -signkey minipj.key -in minipj.csr -out minipj.crt
Signature ok
subject=/C=kr/ST=seoul/L=seocho/O=encore/OU=cloudclass/CN=client.miniproject.com/emailAddress=test123@gmail.com
Getting Private key
2.6.6. 키와 crt의 권한을 제한하고 키를 지정된 경로로 이동시키기
[root@wordpress certs]# chmod 600 minipj.key minipj.crt
[root@wordpress certs]# ls -l minipj.key minipj.csr minipj.crt
-rw-------. 1 root root 1334  3월 16 17:04 minipj.crt
-rw-r--r--. 1 root root 1070  3월 16 17:04 minipj.csr
-rw-------. 1 root root 1679  3월 16 17:03 minipj.key
[root@wordpress certs]# mv minipj.key /etc/pki/tls/private
2.6.7. SSL 파일 설정
vi /etc/httpd/conf.d/ssl.conf 파일을 설정해준다.
그리고 httpd를 재시작해준다.
[root@wordpress certs]# vi /etc/httpd/conf.d/ssl.conf


    100 SSLCertificateFile /etc/pki/tls/certs/minipj.crt
    101
    102 #   Server Private Key:
    103 #   If the key is not combined with the certificate, use this
    104 #   directive to point at the key file.  Keep in mind that if
    105 #   you've both a RSA and a DSA private key you can configure
    106 #   both in parallel (to also allow the use of DSA ciphers, etc.)
    107 SSLCertificateKeyFile /etc/pki/tls/private/minipj.key


[root@wordpress certs]# systemctl restart httpd
2.6.8. 확인

3. 진행 과정에서 생긴 에러 해결 목록
- DB 서버로의 접근이 막혔을 때 생긴 에러
- yum 이 실행중인 상태로 멈춰있어 생긴 에러
- yum 실행했을 때 'Cannot find a valid baseurl for repo: base/7/x86_64' 에러
- DNS 네임 서버가 잘못된 주소이거나, 해당 주소에 정보가 없을 때 (예를 들면 내가 만든 DNS서버가 유일하게 등록되어 있을 때) 네트워크 연결이 안되면서 발생한다. 혹은 네트워크 연결이 아에 끊어져 있을 때도 발생.
'클라우드 > 프로젝트' 카테고리의 다른 글
| IaC를 이용한 클라우드 환경에서의 Wordpress 자동화 배포 (0) | 2022.05.02 |
|---|---|
| AWS | AWS 클라우드를 이용한 고가용성 Wordpress 서비스 배포 (0) | 2022.04.06 |

